Creating a Chat Bot with Microsoft’s QnA Maker and Azure Bot Service
January 23, 2018 18 Comments

Microsoft has a service in preview, called QnA Maker. It is a free (presently) service, which provides a REST and web-based service that trains AI to respond to questions asked of it. You’ve seen these on other sites, as these have become quite common, and ease the burden on support for SharePoint, or any other service out there. Chat bots can field common questions, freeing up time and energy spent on answering common asks.
They make it very easy to use – you can point it to a URL, type in your questions and answers, or upload a document (.docx, .doc, .pdf, .xlsx, and .tsv). The tricky part, is getting this from loading your knowledge base, to actually having a chat bot on your site. This is what this blog post is for, is to show you how to do it. They do have directions, but not a full walk-through on what to do.
This post assumes that you have at the very least, an Azure Account. If not, you can start one for free.
QnA Maker Setup
First, go to http://qnamaker.ai, this is where you will get started. Click on Create New Service
Then sign in with a Microsoft ID, or organizational account like you would into Azure, Office365, Outlook.com, etc.
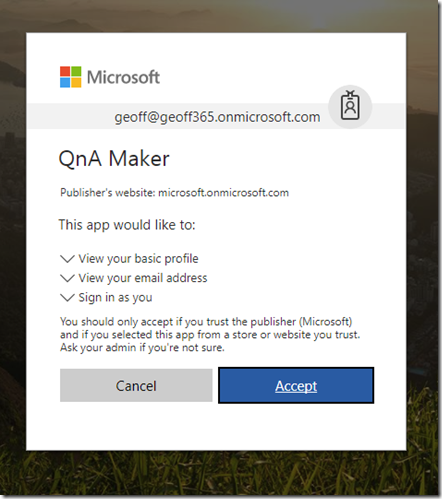
It will then ask you to provide permissions to QnAMaker, click Accept
Then you must agree to the terms and privacy statement, check the box and hit Continue
Enter in a name for your bot. I am choosing Testbot 9001
You now have 3 options for loading data into your Chat Bot…
- From a URL that links to a resource which has a clear Q&A format, like a FAQ
- From a file, in Question/Answer format (supported file types are .TSV*, .PDF, .DOC, .DOCX, and .XLSX format)
*TSV stands for Tab Separated Values. Like a CSV, but, you know, with Tabs. You can do this in Excel. - Enter them in manually
For our Testbot 9001, we will be uploading from Excel. So, let’s create a new Excel file. In the first column, type in the question, or phrase, which the chatbot AI will hit on and use to provide the answer. Use the second column to provide that answer. Here is my example file:
Now, save the file. And go back to the QnA Maker setup, and choose Select file… next to the FILES section
and select the XLSX file from your local computer you just saved
Then scroll to the bottom and select Create
You will then see a dialog window appear while the service scans your file, and imports your Questions and Answers
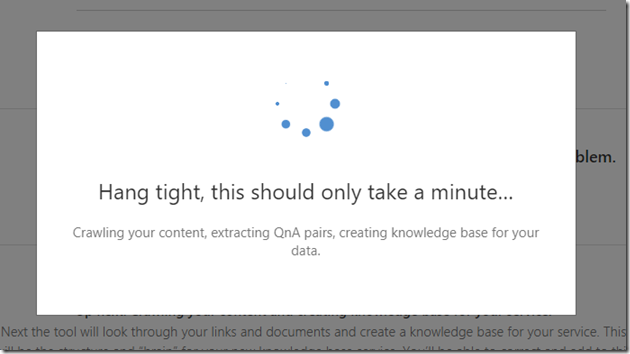
Once complete, it will take you to the Testbot 9001 Knowledgebase.
Select Test from the side bar, and you can test the functionality with your questions
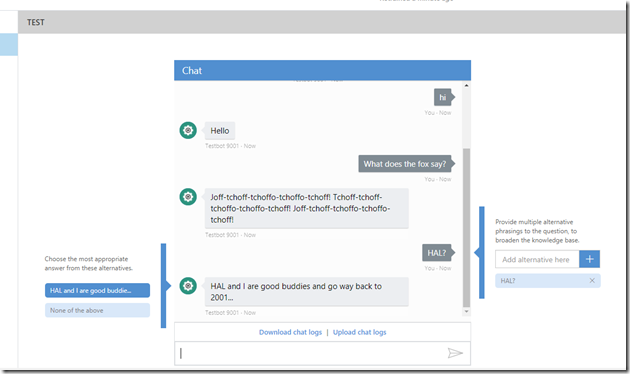
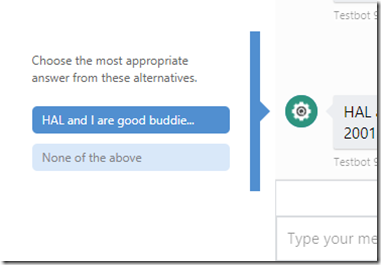
Cool, huh? The testing also allows you to train the bot as well. Such as choosing the best answer based upon what you had typed
Or providing multiple alternative phrasings, or synonyms
When done, click Save and Retrain to save your changes
You can see back in the main Knowledgebase, that it has been updated by what we asked and what we updated the suggestions and phrasings with
You can also add new Q & A pairs by clicking on Add new QnA pair
When done, Save & Retrain again to save your settings.
Once you are ready… click Publish
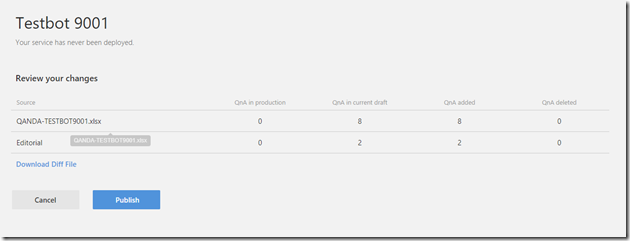
It will then show you what will be published… and then when ready, click Publish
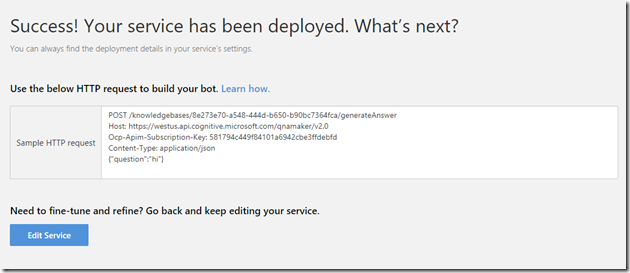
The deployment confirmation screen will show you the example HTTP request for using your bot through the REST API. These are also available in the Settings link on the sidebar of the Knowledgebase.
We will need some f this information in a few minutes, so take down the Knowledgebase ID
And the Subscription Key
and put those aside for a few minutes…
Azure Bot Service Setup
Next we’re going to use the Azure Bot Service to setup our bot. To do so, we’ll be following these instructions: https://docs.microsoft.com/en-us/bot-framework/bot-service-quickstart
Log into the Azure Portal
Click on New > AI + Cognitive Services > Web App Bot
- Name: Testbot9001
So you can identify the soldiers in your bot army! - Subscription: GeoffOps
Choose your own subscription. This one is mine. You can’t have it.
- Resource Group: Testbot9001
Use an existing or create a new one
- Location: East US
Select the data center region you would like to use
- Pricing Tier: FO (10K Premium Messages)
This defaults to S1 Standard, change this to F0 Free. Or else you will pay for the service
- App Name: Testbot9001
- Bot template: Question and Answer
- App service plan/Location: Testbot9001
You will need to create a new one, or use an existing. For this example, I created a new one also in East US
- Azure Storage: testbot9001a325
I am letting Azure create a new one for me. This is a data storage account, like a fileshare. You can use an existing one if you have one as well.
- Application Insights: Off
This is not free. So I turned it off.
Then click Create to bring life to your Azure Bot. I twill validate your choices, and then when complete, will begin deployment.
When deployment has completed, you can find the bot and associates Azure resources under the All Resources blade of the left, or, if you have other stuff in Azure, go to the Resource Groups blade, and click on your Resource Group we created in the Bot setup above. In my case, the Resource Group is Testbot9001
Ok. So, we’ve created our bot with QnA Maker, and created a Bot Service in Azure… now what? We need to connect the two.
Select your bot, it’ll be the one which has a TYPE of Web App Bot
On the left hand side, click on APP SERVICE SETTINGS > Application Settings
And then scroll down to App settings. You will see two blank settings called QnAKnowledgebaseId and QnASubscriptionKey
Now, remember those things we copied off earlier? Pate these in there.
And then click Save up top
Now, click on Test in Web Chat on the left side, and test out your new bot!
Pretty neat! But… now what?
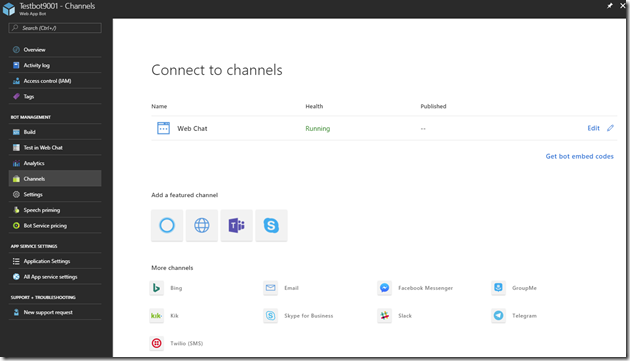
Click on Channels on the left side. You will see Web Chat setup and running by default. You can also see, you can extend this out to Teams, Skype, and more pretty easily.
Click on Edit, and copy the Embed Code
And show one of the keys at the top
and replace the YOUR_SECRET_HERE in the embed code
And you can now drop that into a site, web part, whatever you’d like. It’s just an iFrame, so the possibilities are endless.
A simple example – using Embed Code on a SharePoint page:
Would I implement it like this for a client? Likely not… I’d be more apt to have a sliding pop-up window, similar to Facebook chats that can be minimized and maximized as needed. This was just an example to show how to build one of these.








A note that I did not include in the article: The Chat Bot pricing is free if you use F0, but the App Service that hosts the Chat Bot is not. Consider if not using it, disabling to removing the Bot.
Pingback: Slides from February 13, 2018 BASPUG Meeting | Geoff Varosky's Blog
Hello, I cant find the QnAKnowledgebaseId field for some reason…has the portal been updated?
I just checked and it is still there. Did you choose the “Question and Answer” bot template during setup? That and QnASubscriptionKey should both show up under Application Settings.
Pingback: North American Collaboration Summit presentation and samples | Gav's Blog – SharePoint .NET & Tech
thank you. your article helped. i have a question about the App Service that hosts the Chat Bot. we dont have an option other than paying it right?
Not that I am aware of. There are always promotions going on with Azure however. I, for instance, via my company, get x amount of dollars every month as a credit to use for development and testing in Azure. You may have something similar. There is currently a $200 30 day promotional credit happening: https://azure.microsoft.com/en-us/free/
Hi, great article… I used it and setup the bot exactly as is. but when I go to “test in Web Chat”, it just stalls at waiting for bot to be ready. I am using QnA Bot service.
Thanks Chris! If you have the KnowledgeBase ID, and the Subscription key in there, it *should* work. I have experienced this before as well however, and just blew away the bot and services in Azure, and re-created it, as it is a simple enough process.
Dude, after key-smashing for hours and running into dead-ends all over the web and utub, your article got me to where I needed to be! Thanks for the screenshots and explanations! I felt productive today.
Happy to hear that this helped you out!
I cant find the QnAKnowledgebaseId and QnASubscriptionKey realy not there. Please help
You need to select “Question and Answer (C#)” for the Bot Template in Azure when setting up the Web App bot. This will then have these two parameters in the Application Settings.
Q&A maker by default select “Azure QnA service”. its mandatory. I am confuse where you published you knowledge base
Hi Geoff,
Thanks for this tutorial. At the end of the article you say that you would create a slidining popup window. I am trying to create the same thing and I can’t find any instructions on how to do so. could you provide some insight on how I would go about creating this?
thanks
Hi Thanks for the article, If you could share us how to get the share point user’s email address and name through the bot , it would be great. Like other channels from.id, or channel id is not working in this scenario.
How would I create a sliding pop-up window, similar to Facebook chats that can be minimized and maximized as needed.
Great article. I was able to deploy the bot in share point. The bot is working fine in Chrome. But not in IE 11 and Edge. Its not letting me send messages. I can type the messages but ‘Enter’ wont do anything. Any idea on this ?
The error I get in the console is
SCRIPT5007: Unable to get property ‘value’ of undefined or null reference
botchat.js (20,80040)
Really appreciate any help here.